

Preface #
In the author’s own words, Pi Coding Agent is an opinionated, minimalist coding agent. After using it for a while, I consider it one of the best AI agent CLIs available today.
Projects that blow up tend to attract low-quality issues and AI-generated PRs, and the name pi is a clever touch — it gets associated with the mathematical constant, which is exactly what the author intended: keep the profile low and the community quality high.
Design Philosophy #
Translated from the official documentation
Pi embraces an almost radically aggressive extensibility, so it neither needs nor wants to prescribe your workflow. Many capabilities that are “built in” elsewhere are achieved here through extensions, skills, or installing third-party pi packages. The core stays lean; you shape Pi around the way you work.
Pi deliberately omits the following, all of which you can absolutely implement via extensions or external tools:
- No MCP. You can build CLI tools with a README (see Skills), or write an extension that adds MCP support to Pi.
- No sub-agents. Spin up multiple Pi instances with tmux, or build your own with extensions.
- No permission popups. Run it in a container, or use extensions to build a confirmation flow that matches your own security requirements.
- No plan mode. Write plans to a file, or implement your own via extensions.
- No built-in to-dos. They tend to confuse the model. Use a
TODO.mdor customize with extensions. - No background bash. Use tmux — fully observable and more direct to interact with.
For a detailed exposition of the design philosophy, see the author’s blog post — an excellent read.
Quick Start #
If you run into trouble along the way, check DeepWiki.
Installation #
Option 1: curl (Linux / macOS)
|
|
Option 2: npm
|
|
Then launch it with the pi command, or bind a shortcut in your terminal.
Windows #
Windows users also need a bash shell. Detection order:
- Custom path in
~/.pi/agent/settings.json - Git Bash (
C:\Program Files\Git\bin\bash.exe) bash.exeon PATH (e.g., Cygwin, MSYS2, WSL)
For most users, Git for Windows is enough.
Custom shell path (settings.json):
|
|
Termux (Android) #
See the official documentation.
Model Configuration #
Once configured, pick a model with /model (or Ctrl+L).
Subscriptions #
If you have one of these subscriptions:
- Claude Pro/Max
- ChatGPT Plus/Pro (Codex)
- GitHub Copilot
log in via /login, and log out with /logout. Auth tokens are stored in ~/.pi/agent/auth.json.
API Keys #
Set them via environment variables:
|
|
or write them into ~/.pi/agent/auth.json:
|
|
Supported API key providers:
| Provider | Environment variable | auth.json key |
|---|---|---|
| Anthropic | ANTHROPIC_API_KEY |
anthropic |
| Azure OpenAI Responses | AZURE_OPENAI_API_KEY |
azure-openai-responses |
| OpenAI | OPENAI_API_KEY |
openai |
| DeepSeek | DEEPSEEK_API_KEY |
deepseek |
| Google Gemini | GEMINI_API_KEY |
google |
| Mistral | MISTRAL_API_KEY |
mistral |
| Groq | GROQ_API_KEY |
groq |
| Cerebras | CEREBRAS_API_KEY |
cerebras |
| xAI | XAI_API_KEY |
xai |
| OpenRouter | OPENROUTER_API_KEY |
openrouter |
| Vercel AI Gateway | AI_GATEWAY_API_KEY |
vercel-ai-gateway |
| ZAI | ZAI_API_KEY |
zai |
| OpenCode Zen | OPENCODE_API_KEY |
opencode |
| OpenCode Go | OPENCODE_API_KEY |
opencode-go |
| Hugging Face | HF_TOKEN |
huggingface |
| Fireworks | FIREWORKS_API_KEY |
fireworks |
| Together AI | TOGETHER_API_KEY |
together |
| Kimi For Coding | KIMI_API_KEY |
kimi-coding |
| MiniMax | MINIMAX_API_KEY |
minimax |
| MiniMax (China) | MINIMAX_CN_API_KEY |
minimax-cn |
By default, auth.json is created with 0600 permissions (owner read/write only). Credentials in the auth file take precedence over environment variables.
Third-Party Providers #
Add custom providers and models (Ollama, vLLM, LM Studio, proxies, etc.) via ~/.pi/agent/models.json.
Full example:
|
|
Supported API types:
| API | Description |
|---|---|
openai-completions |
OpenAI Chat Completions (most compatible) |
openai-responses |
OpenAI Responses API |
anthropic-messages |
Anthropic Messages API |
google-generative-ai |
Google Generative AI |
- An
apiset at theproviderslevel acts as the default for all models under that provider. - At the
modelslevel, an individual model can override the default with its ownapifield. - If you hit
Error: 403 Your request was blocked, the request was blocked by Cloudflare. Add a custom User-Agent header:
|
|
The file is reloaded every time you type /model in Pi, so editing models.json requires no restart.
Guide #
See the official documentation
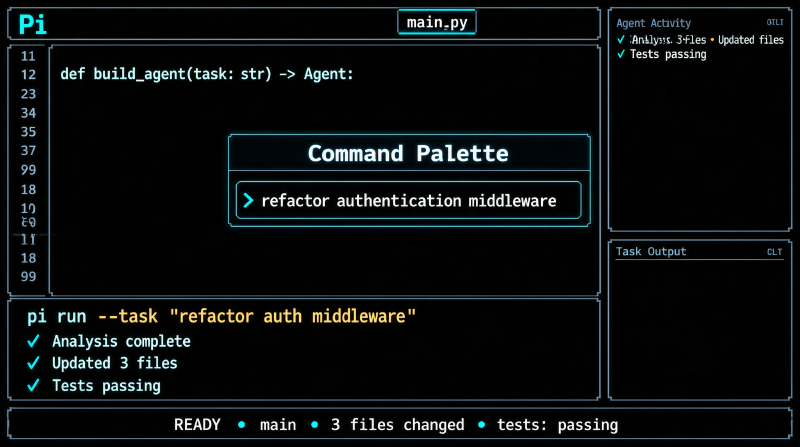
Get a feel for the TUI. You can write themes and extensions to customize it — you can even make Pi look completely different.
Editor #
| Feature | Usage |
|---|---|
| File references | Type @ to fuzzy-search project files |
| Path completion | Press Tab to autocomplete paths |
| Multi-line input | Shift+Enter (Ctrl+Enter also works in Windows Terminal) |
| Images | Paste with Ctrl+V (Alt+V on Windows), or drag straight into the terminal |
| Shell commands | !command runs a command and sends the output to the model |
| Hidden shell commands | !!command runs a command without sending the output |
| External editor | Ctrl+G opens $VISUAL or $EDITOR |
Deleting words, undoing, and the like use standard editing shortcuts. See Keybindings.
Commands #
Type / in the editor to invoke commands. Extensions can register custom commands, skills can be invoked with /skill:name, and prompt templates expand via /templatename.
| Command | Description |
|---|---|
/login, /logout |
OAuth login/logout |
/model |
Switch models |
/scoped-models |
Enable/disable cycling through a scoped model list with Ctrl+P |
/settings |
Set thinking level, theme, message delivery, transport |
/resume |
Resume from a past session |
/new |
Start a new session |
/name <name> |
Set the session display name |
/session |
Show session info (path, tokens, cost) |
/tree |
Jump to any node in the session and continue from there |
/fork |
Create a new session from a previous user message |
/clone |
Copy the current active branch into a new session |
/compact [prompt] |
Manually compact the context, with an optional custom compaction prompt |
/copy |
Copy the assistant’s last reply to the clipboard |
/export [file] |
Export the session as an HTML file |
/share |
Upload as a private GitHub Gist and generate a shareable HTML link |
/reload |
Reload extensions, skills, prompts, and context files (themes hot-reload automatically) |
/hotkeys |
Show all hotkeys |
/changelog |
Show the changelog |
/quit |
Quit pi |
Message Queue #
While the agent is working, you can keep sending messages:
- Enter: queue a steering message, delivered as soon as the current assistant turn finishes executing its pending tool calls
- Alt+Enter: queue a follow-up message, delivered after the agent finishes all its work
- Escape: abort the current run and restore queued messages to the editor
- Alt+Up: pull messages from the queue back into the editor
You can configure delivery in Settings: steeringMode and followUpMode accept "one-at-a-time" (default — send the next message only after a reply arrives) or "all" (send the entire queue at once). transport sets the channel preference for providers that support multiple transports ("sse", "websocket", or "auto").
Sessions #
Sessions are saved as JSONL trees. Every record has an id and parentId, so you can branch within the same file without creating new ones.
Management #
Sessions auto-save to ~/.pi/agent/sessions/, grouped by working directory.
|
|
Branching #
/tree: browse the session tree inside the current session file. Pick any historical node and continue from there — all branches stay in the same session file. Type keywords to search;←/→paginate. Filter modes (Ctrl+O): default → no-tools → user-only → labeled-only → all. Presslto bookmark an entry./fork: create a new session file from a previous user message. A picker opens, copies the history up to the selected node, and puts that node’s message into the editor./clone: copy the current active branch into a new session file.
Settings #
Use /settings to change common options, or edit the JSON files directly:
| Location | Scope |
|---|---|
~/.pi/agent/settings.json |
Global |
.pi/settings.json |
Project |
See the official documentation.
Project Context #
At startup, Pi loads AGENTS.md (or CLAUDE.md) from:
~/.pi/agent/AGENTS.md(global)- Parent directories (searched upward from the current working directory)
- The current directory
Use it for project notes, constraints, and wrappers for common commands. All matching md files get concatenated together.
System Prompt #
- Replace the system prompt with
.pi/SYSTEM.md(project) or~/.pi/agent/SYSTEM.md(global) - Use
APPEND_SYSTEM.mdto append to the end of the system prompt instead of replacing it
Customization #
Everything in this section can be packaged as a pi package. Public ones are listed at Packages - pi.dev.
Prompt Templates #
Wrap prompts as Markdown files and expand them by typing /filename.
|
|
Put them in ~/.pi/agent/prompts/ (global), .pi/prompts/ (project), or share them as a pi package.
Skills #
Skill packs loaded on demand, following the Agent Skills standard. Invoke them by typing /skill:name, or let the agent load them automatically.
|
|
Install locations:
- Global:
~/.pi/agent/skills/,~/.agents/skills/ - Project:
.pi/skills/,.agents/skills/(parent directories are searched level by level upward from the current working directory)
Or package them as a pi package. See the official documentation.
Extensions #
Write extensions in TypeScript to add tools, commands, events, and custom UI to Pi.
Drop them into ~/.pi/agent/extensions/ (global), .pi/extensions/ (project), or package them as a pi package.
See the documentation and the examples.
Themes #
Dark and light themes are built in; themes hot-reload after config changes.
Drop them into ~/.pi/agent/themes/ (global), .pi/themes/ (project), or package them as a pi package.
See the official documentation.
Pi Packages #
Bundle extensions, skills, prompts, and themes into npm/git packages for one-command installation and sharing:
|
|
The extension and theme systems can massively improve the experience. Just tell the model what you want — Pi’s system prompt includes the documentation paths, so the model can understand and use these custom capabilities.